
Dex
Microsoft 365 · MSP onboarding

Onboard your first tenant (MSP)

~10–20 min2 phases · 4 steps
You'll useDexEntra
Before you begin
  • Global Administrator rights in the customer's Microsoft 365 tenant.
Phase 1
Set up your Dex environment
Sign in, convert to multi-tenant, and start adding a client tenant.

Log in and convert to multi-tenant

4 min
In Dex

Open Dex, sign in, then turn your environment into a multi-tenant setup so you can manage multiple client tenants under one roof.
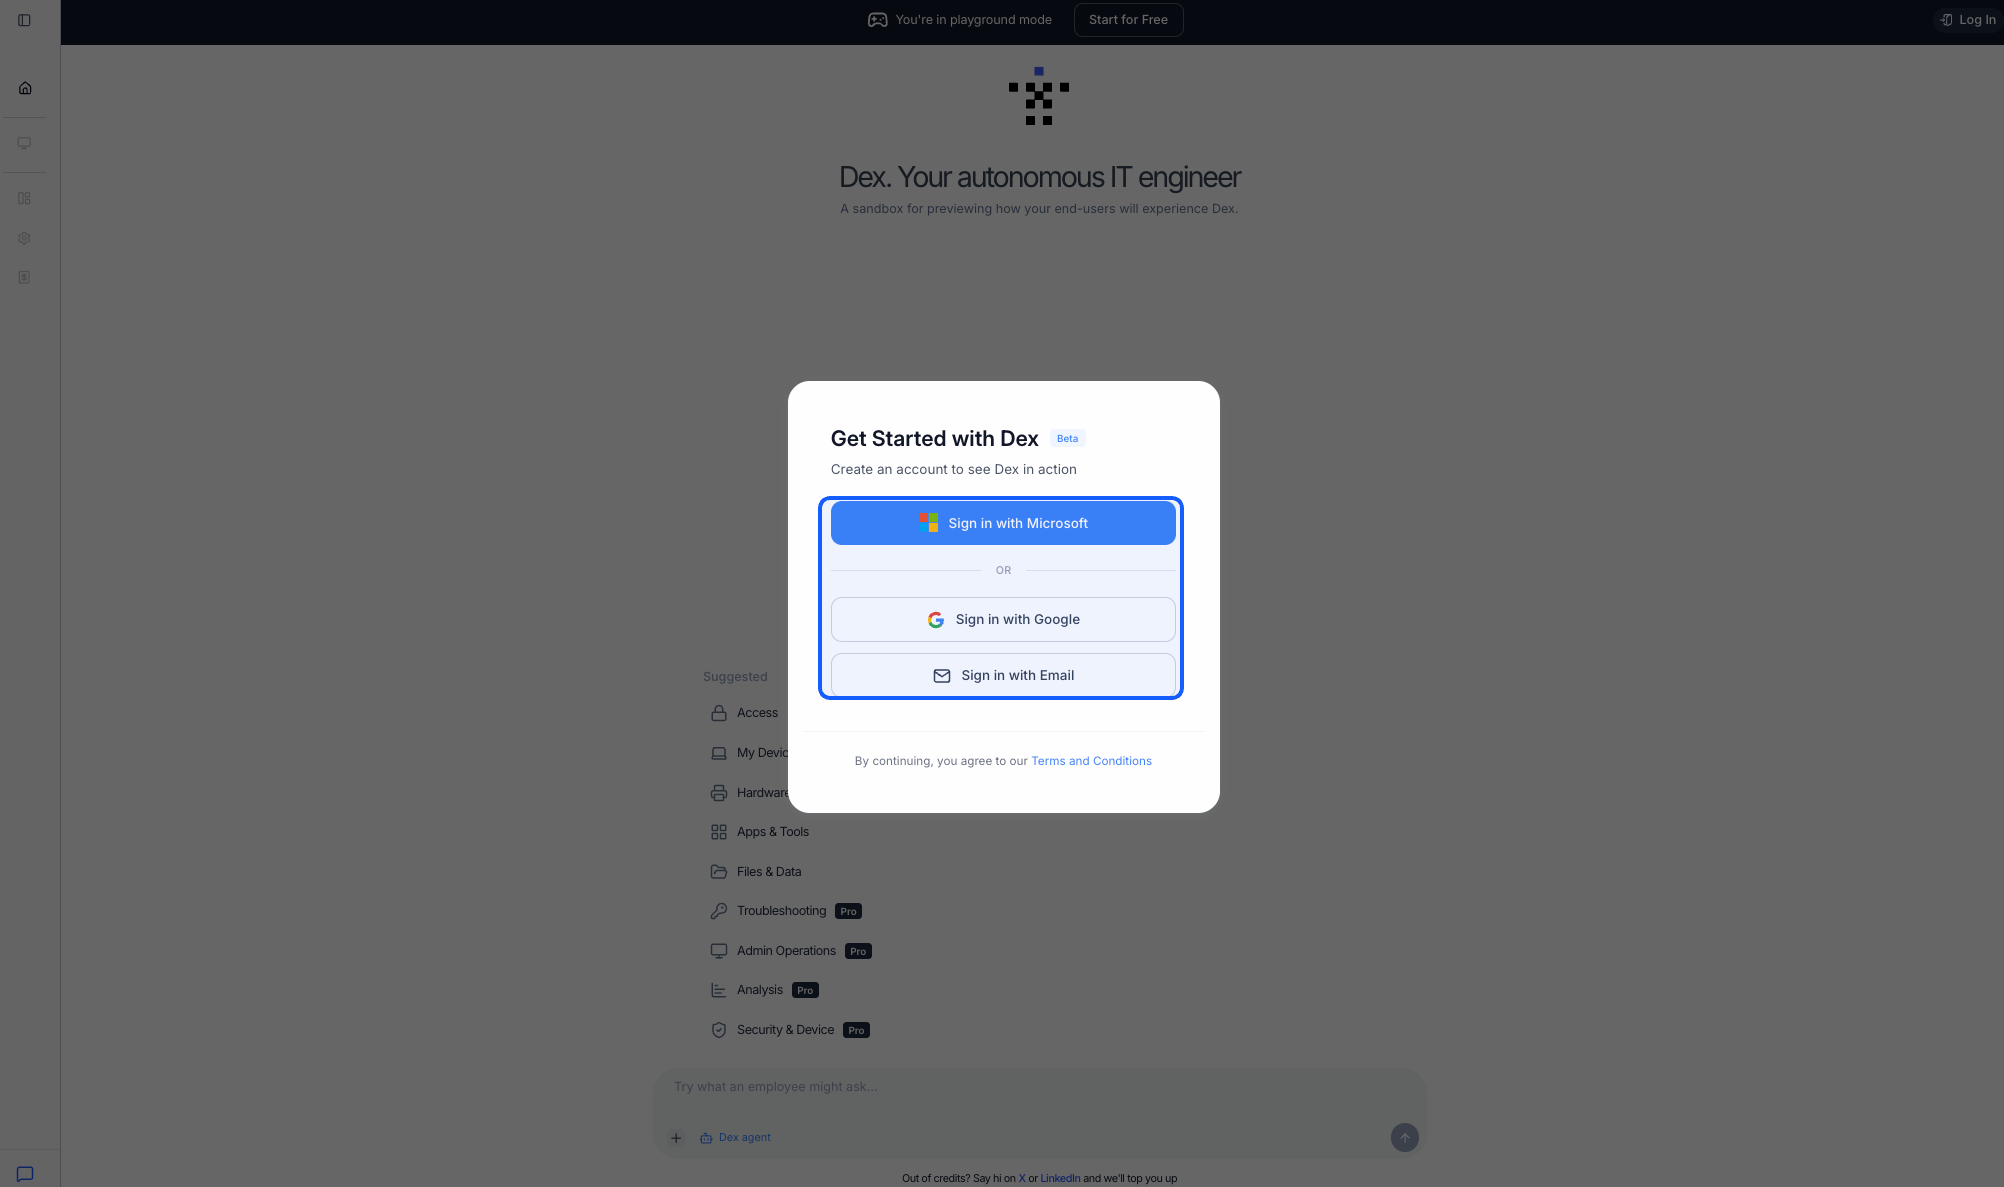
Your region sets where data is stored — eu.dex365.ai keeps it in Europe, dex365.ai in the US. Pick before you sign in; it can't be changed later.
Screenshot
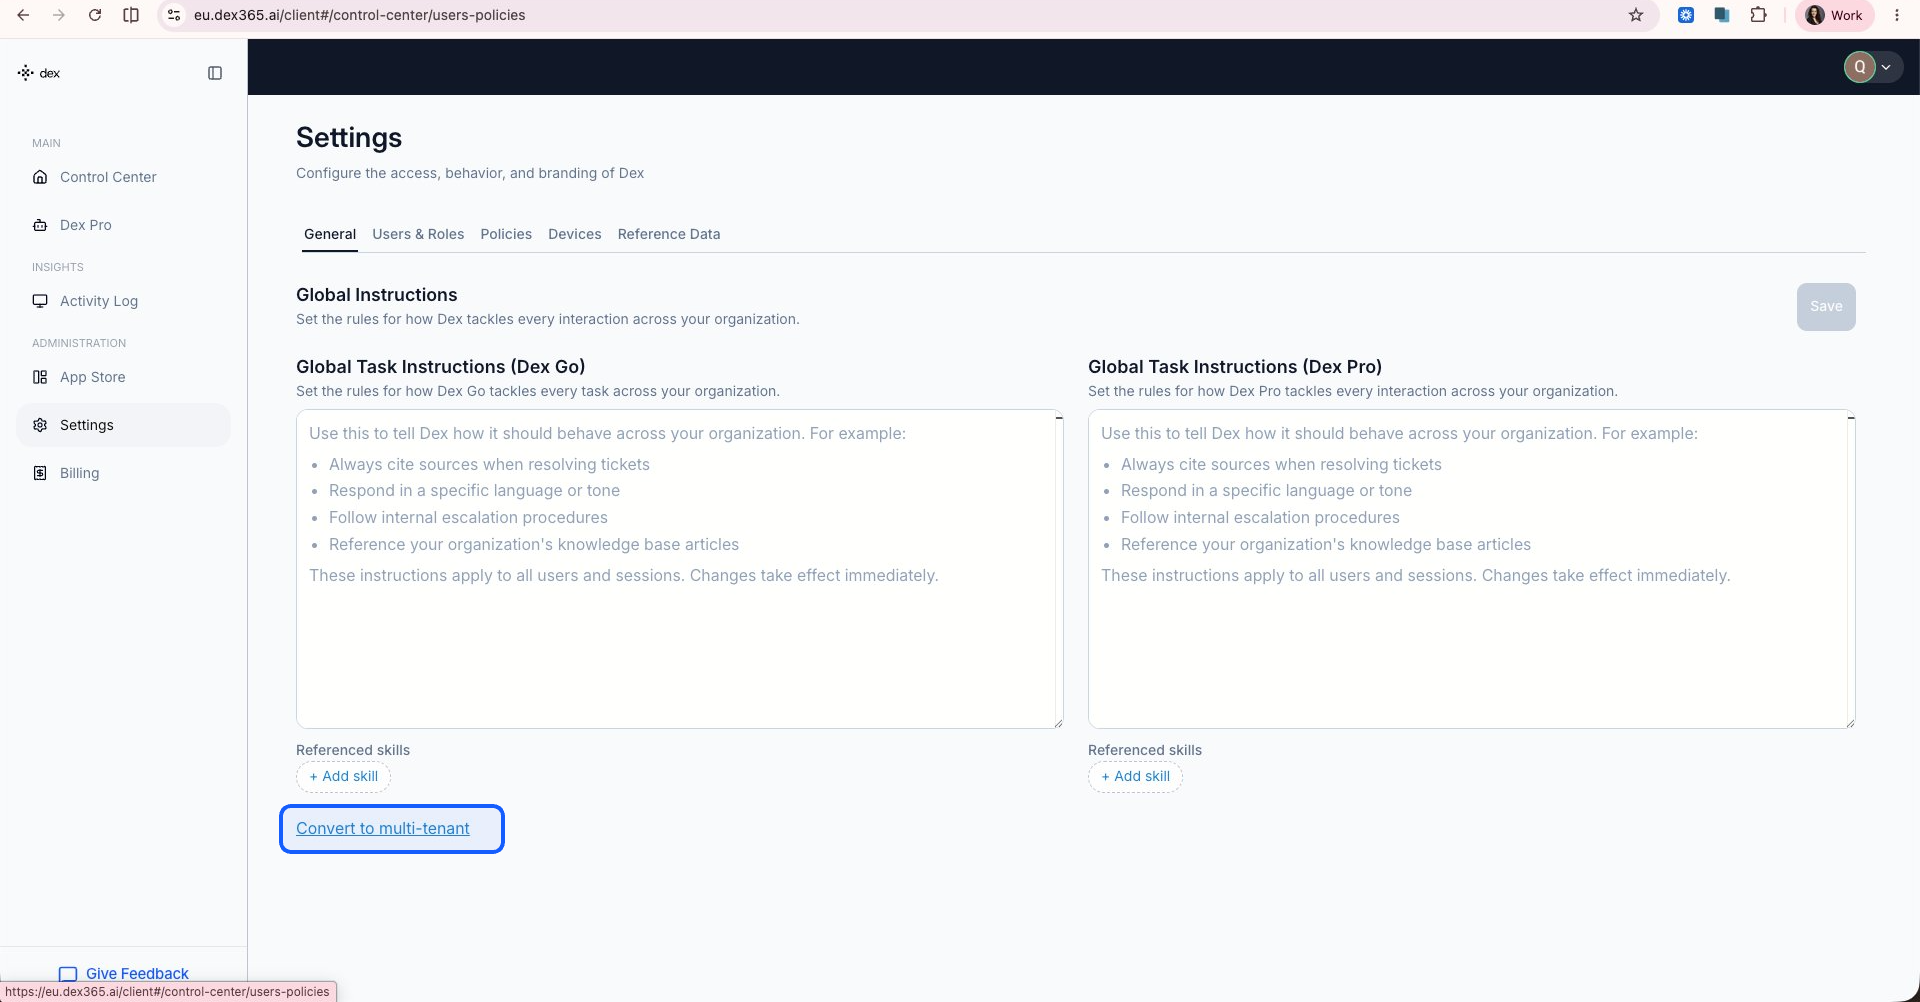
Open Settings → General and scroll to the bottom to find Convert to multi-tenant. Screenshot
Open Settings → General and scroll to the bottom to find Convert to multi-tenant.
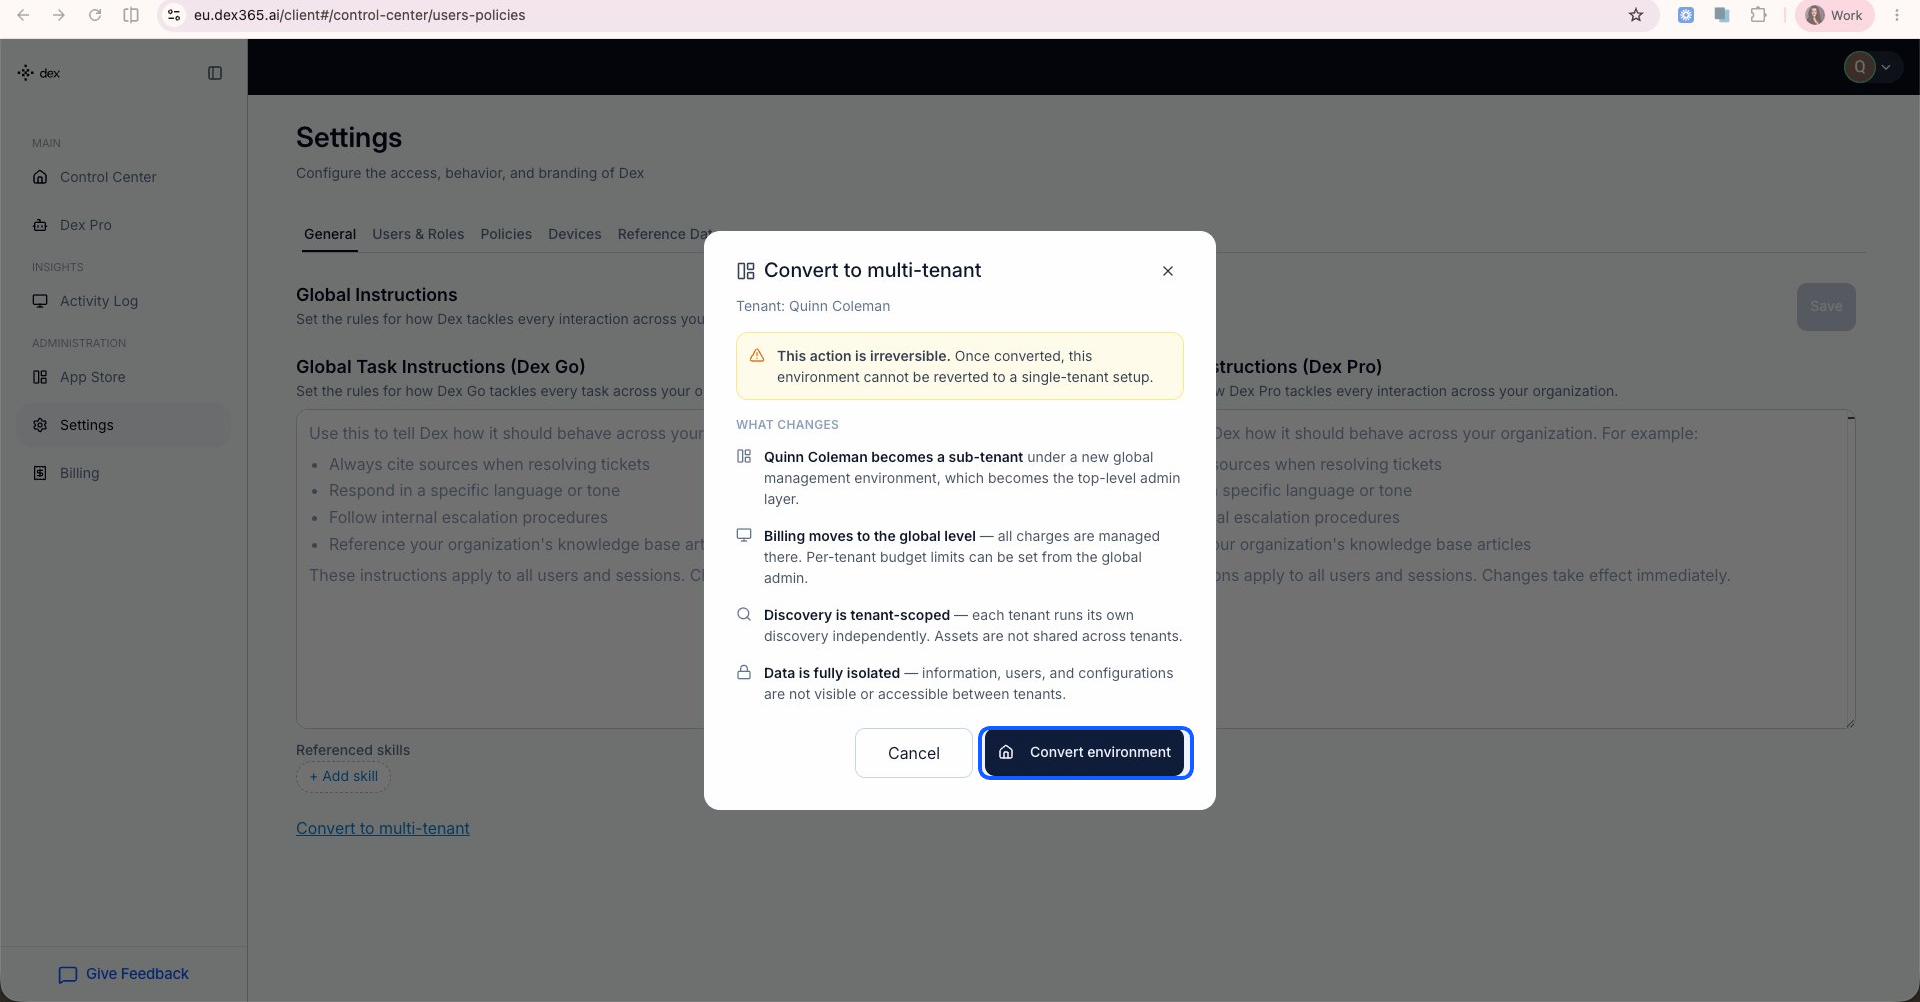
Read the "Convert to multi-tenant" confirmation, then click Convert environment. Screenshot
Read the "Convert to multi-tenant" confirmation, then click Convert environment.
Converting is irreversible
Your current tenant becomes the first sub-tenant under a new global layer; billing and per-tenant budgets move to the global admin; discovery and data stay isolated per tenant.
Signing in as Global Admin?
If your Microsoft SSO account is a Global Administrator on the tenant, Dex can run discovery automatically. MSPs usually don't use Global Admin per client — hence the manual Entra app registration below.

Add your next tenant

2 min
In Dex

You're now on the global Overview, which shows all connected tenants and their status. The domain you logged in with is automatically added as your first tenant. Start registering the client tenant you want to onboard.
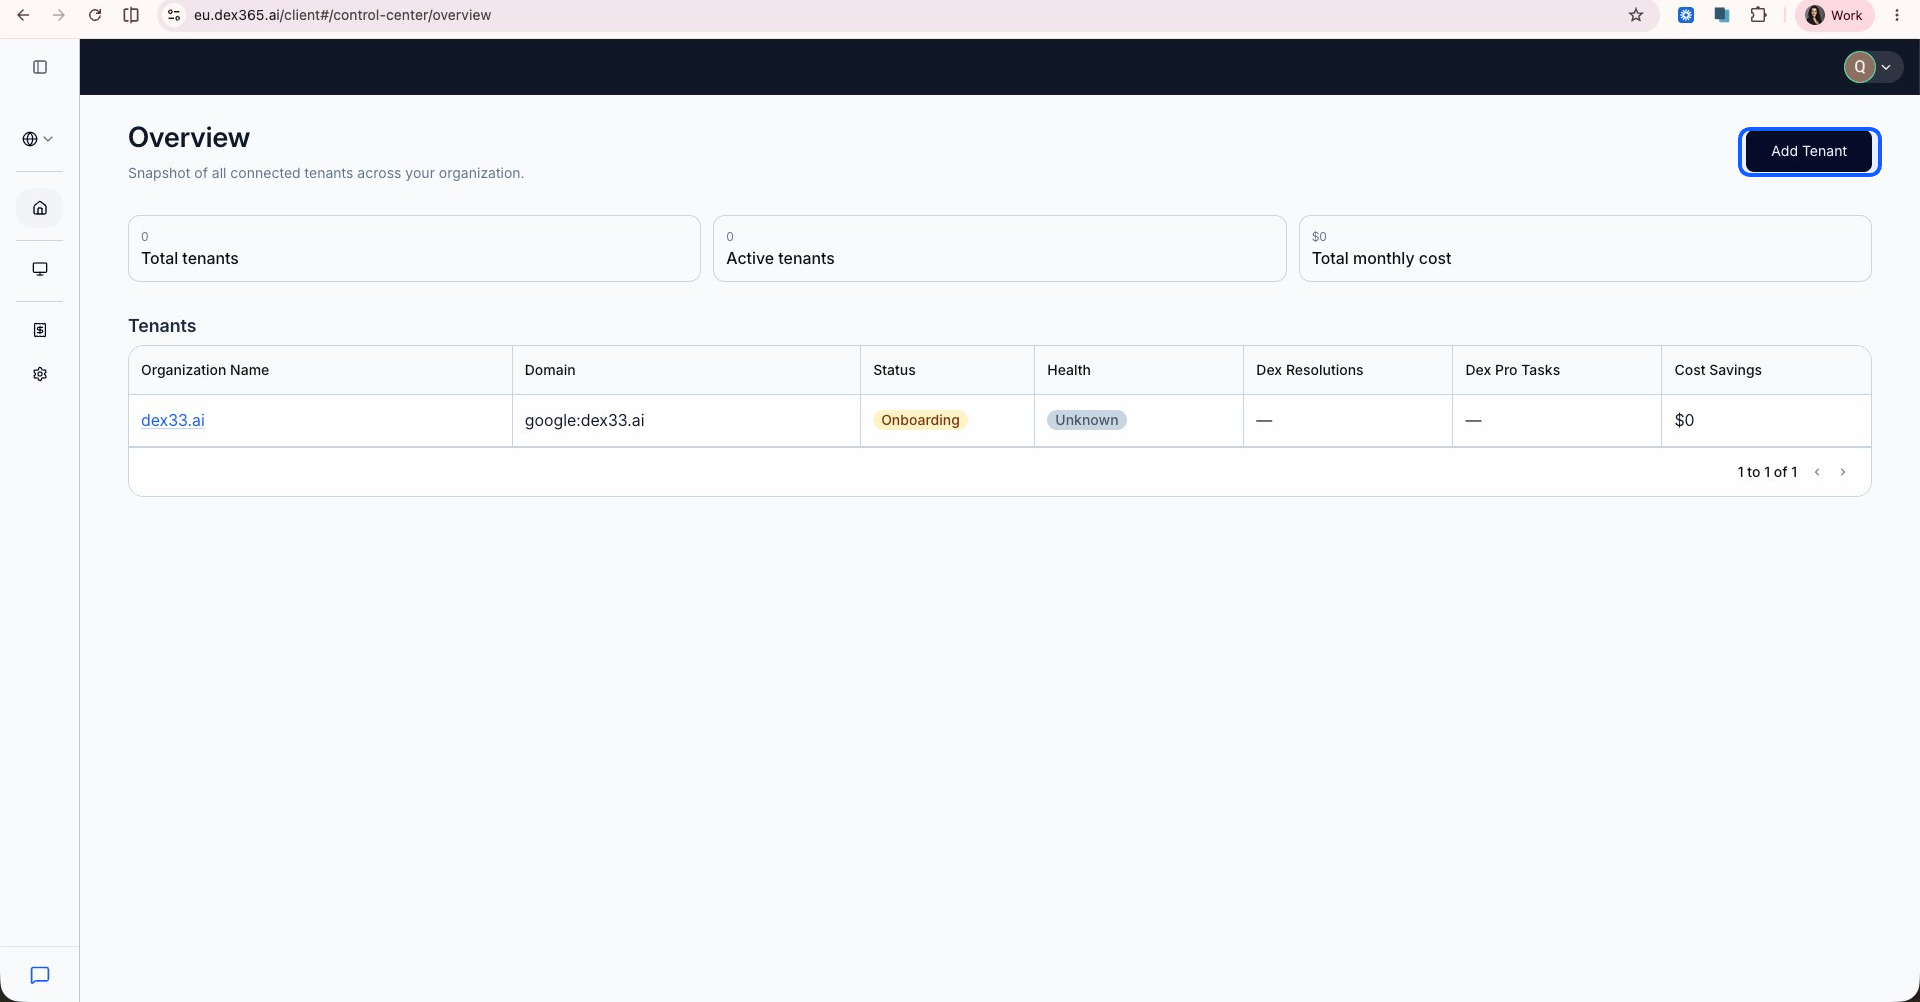
The global Overview — click the 'Add Tenant' button (top right). Screenshot
The global Overview — click the 'Add Tenant' button (top right).
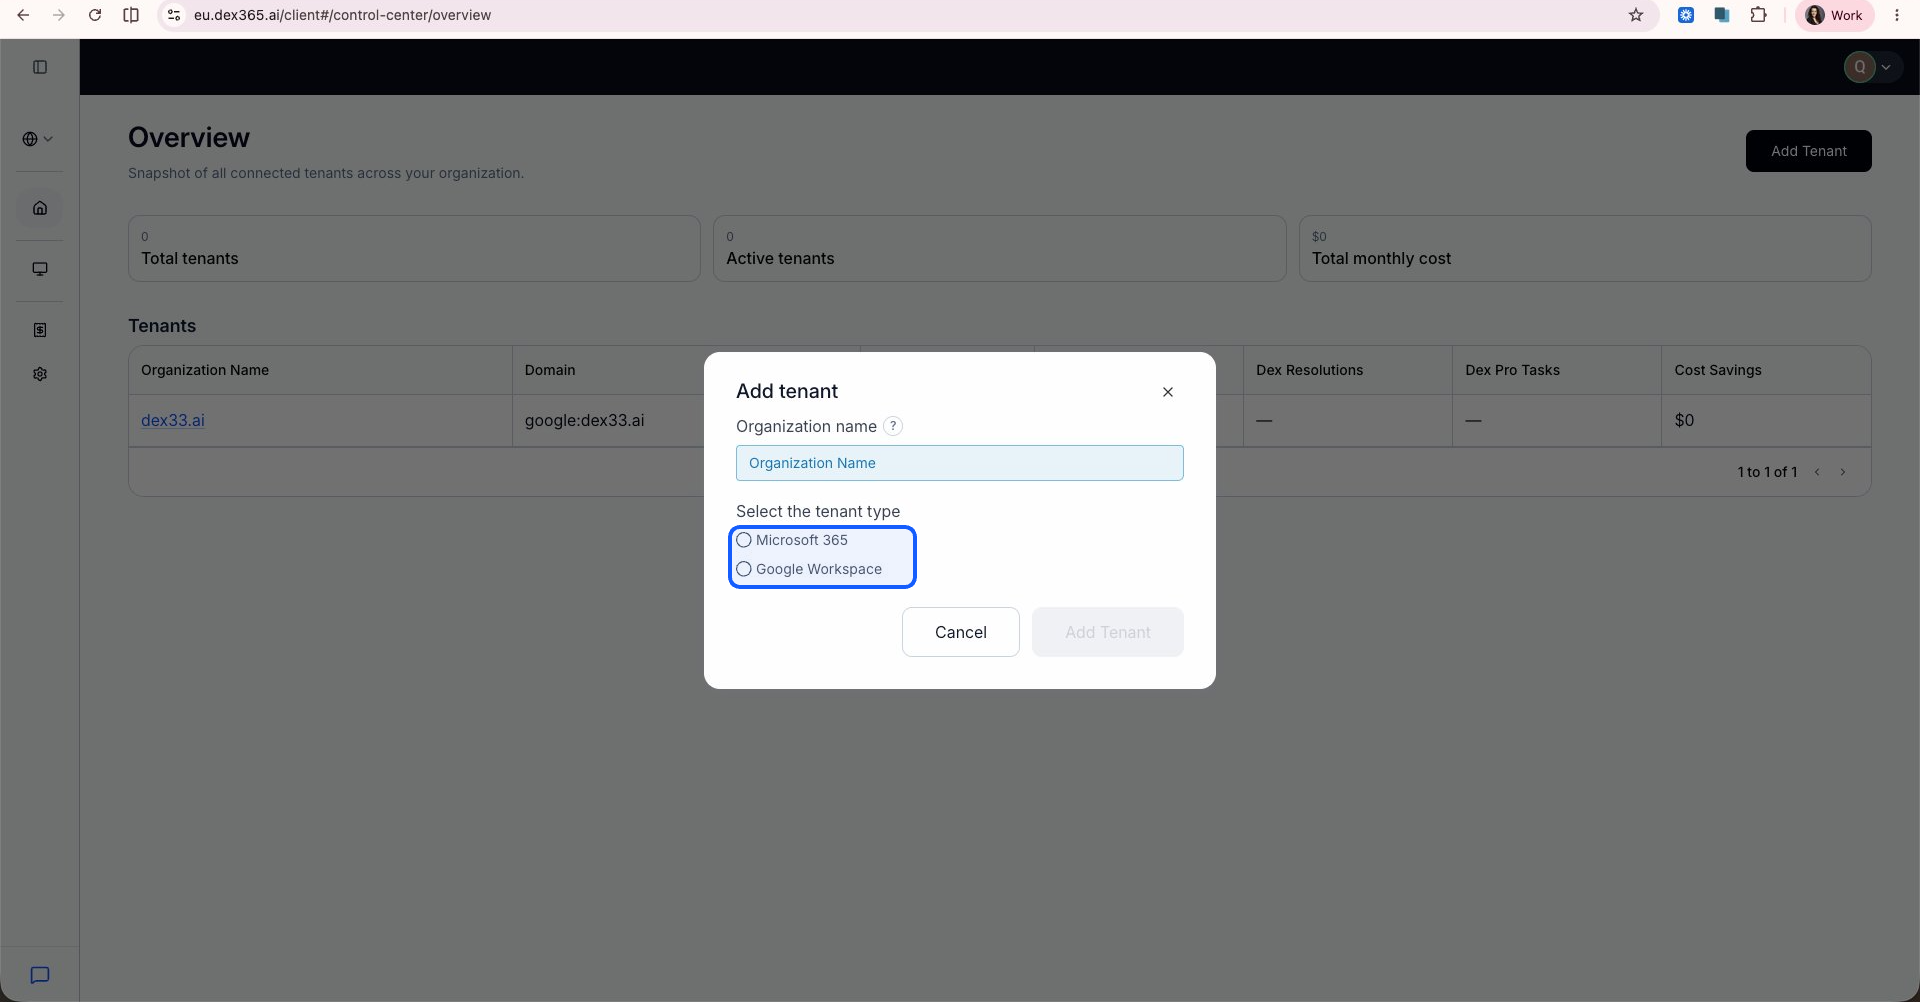
Name the organization and choose the tenant type: Microsoft 365 or Google Workspace. Screenshot
Name the organization and choose the tenant type: Microsoft 365 or Google Workspace.
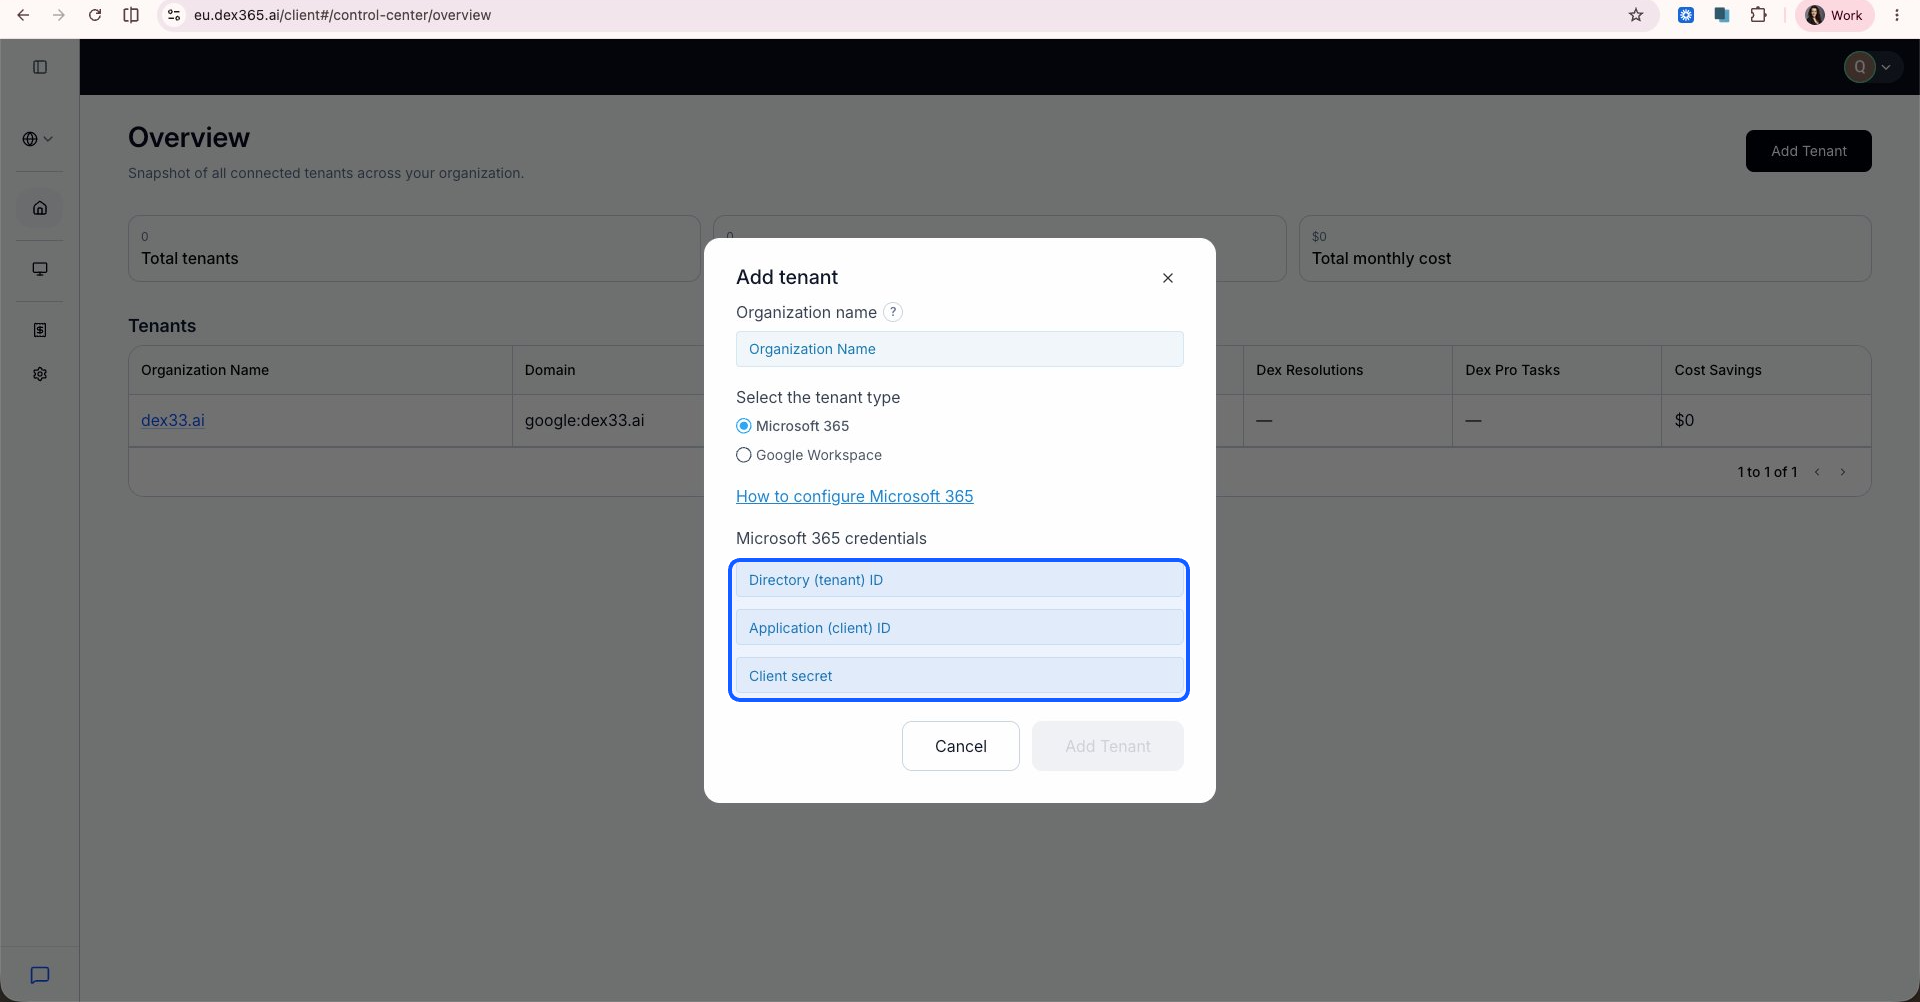
Microsoft 365 selected — the three credential fields appear. Leave this open and fill them from Entra next. Screenshot
Microsoft 365 selected — the three credential fields appear. Leave this open and fill them from Entra next.
Connecting a Google Workspace tenant instead?
This guide covers the Microsoft 365 branch. If the client runs on Google Workspace, follow the dedicated discovery guide.
Connect a Google Workspace tenant (coming soon)
Phase 2
Connect via Microsoft 365
Register Dex in the customer's tenant — with one PowerShell script or manually in Entra — then finish the connection in Dex.
How do you want to register Dex in the customer's tenant?
The steps below change based on your choice — both paths end at the same place.

Run the automated setup script

~3 min
Now in Microsoft Entra

One PowerShell script registers Dex in the customer's tenant: it creates the app registration, creates the client secret, adds all 27 Microsoft Graph permissions, grants admin consent, and prints the three values Dex needs. Run it as a Global Administrator of the customer's tenant.

Where do you want to run the script?
Download and run (paste into Cloud Shell)
Invoke-WebRequest -Uri "https://download.dex365.ai/windows/Setup-DexTenant.ps1" -OutFile Setup-DexTenant.ps1; ./Setup-DexTenant.ps1
Copy the client secret now
It's shown only once and can't be retrieved later. If you lose it, re-run the script or create a new secret in Entra.
That's it for Entra
The script registered the app, created the secret, and granted all 27 permissions. Continue to "Add the tenant in Dex" below and paste the three values.

Add the tenant in Dex

2 min
Now in Dex

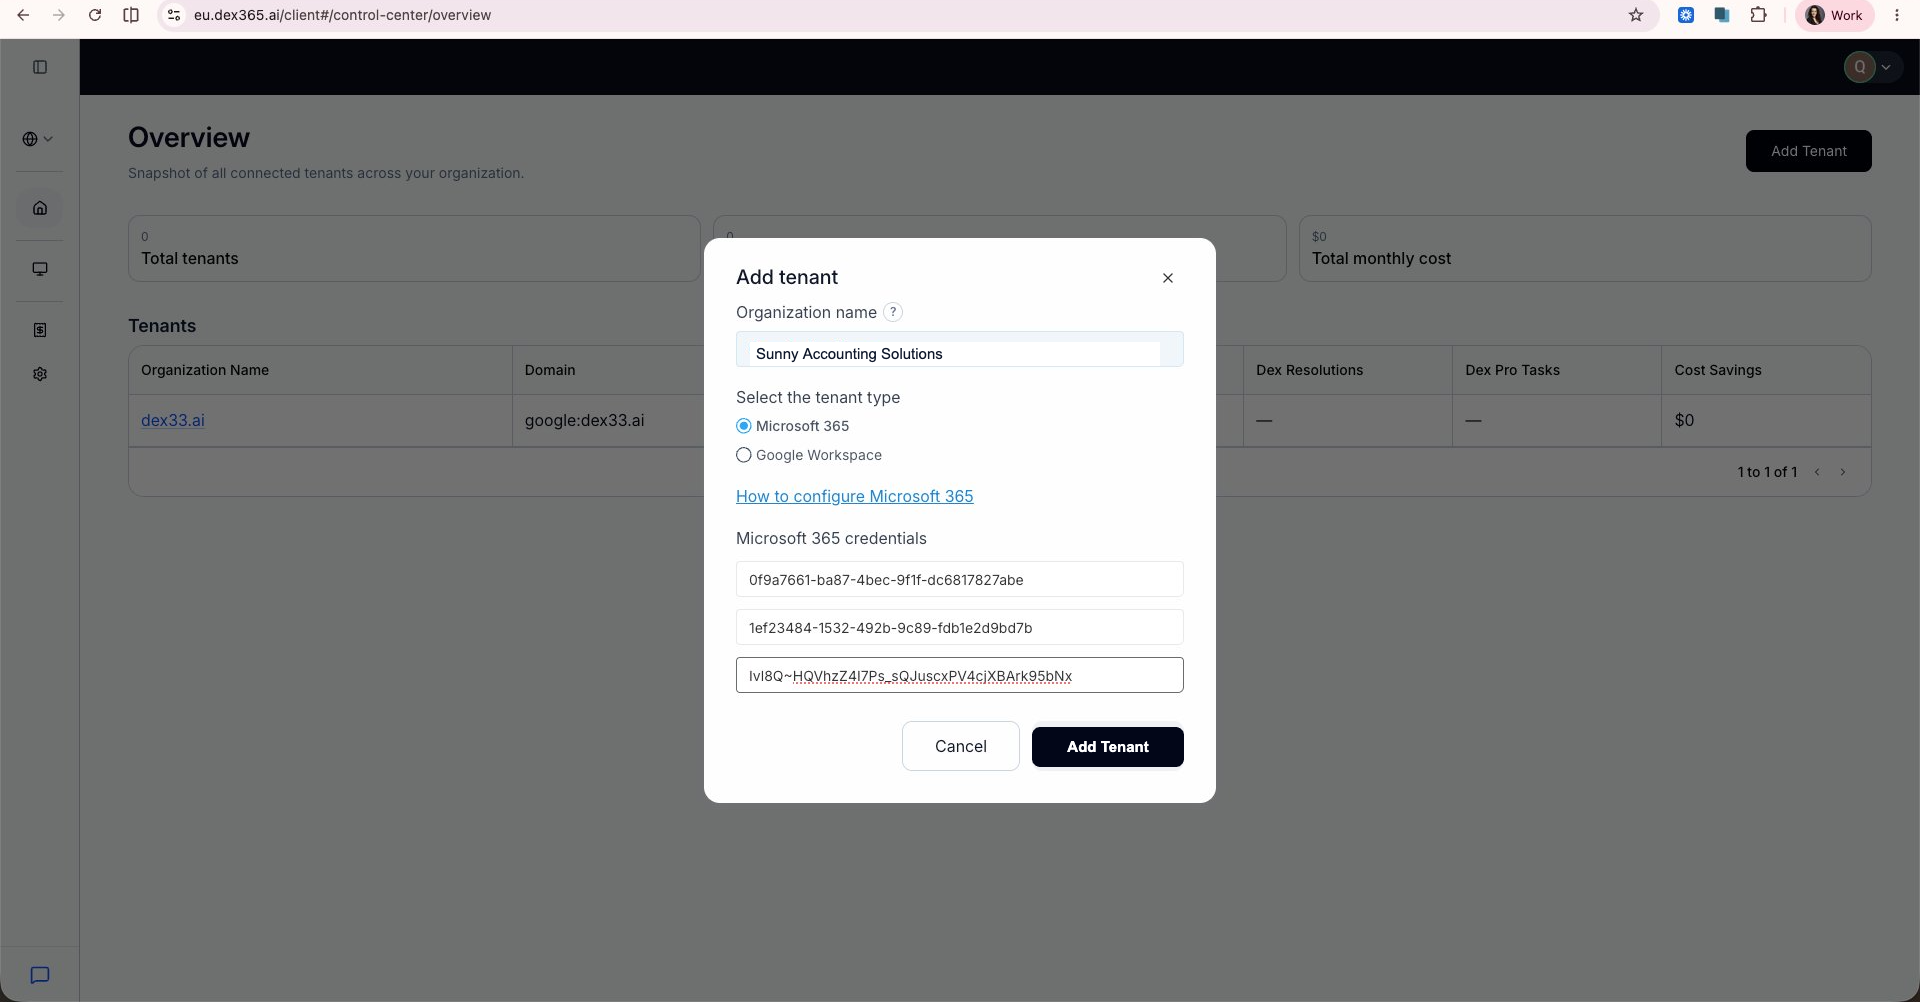
Return to the Dex Add tenant dialog and enter the values you collected. The Organization name is just the label shown in your MSP dashboard — it doesn't need to match the M365 tenant name.
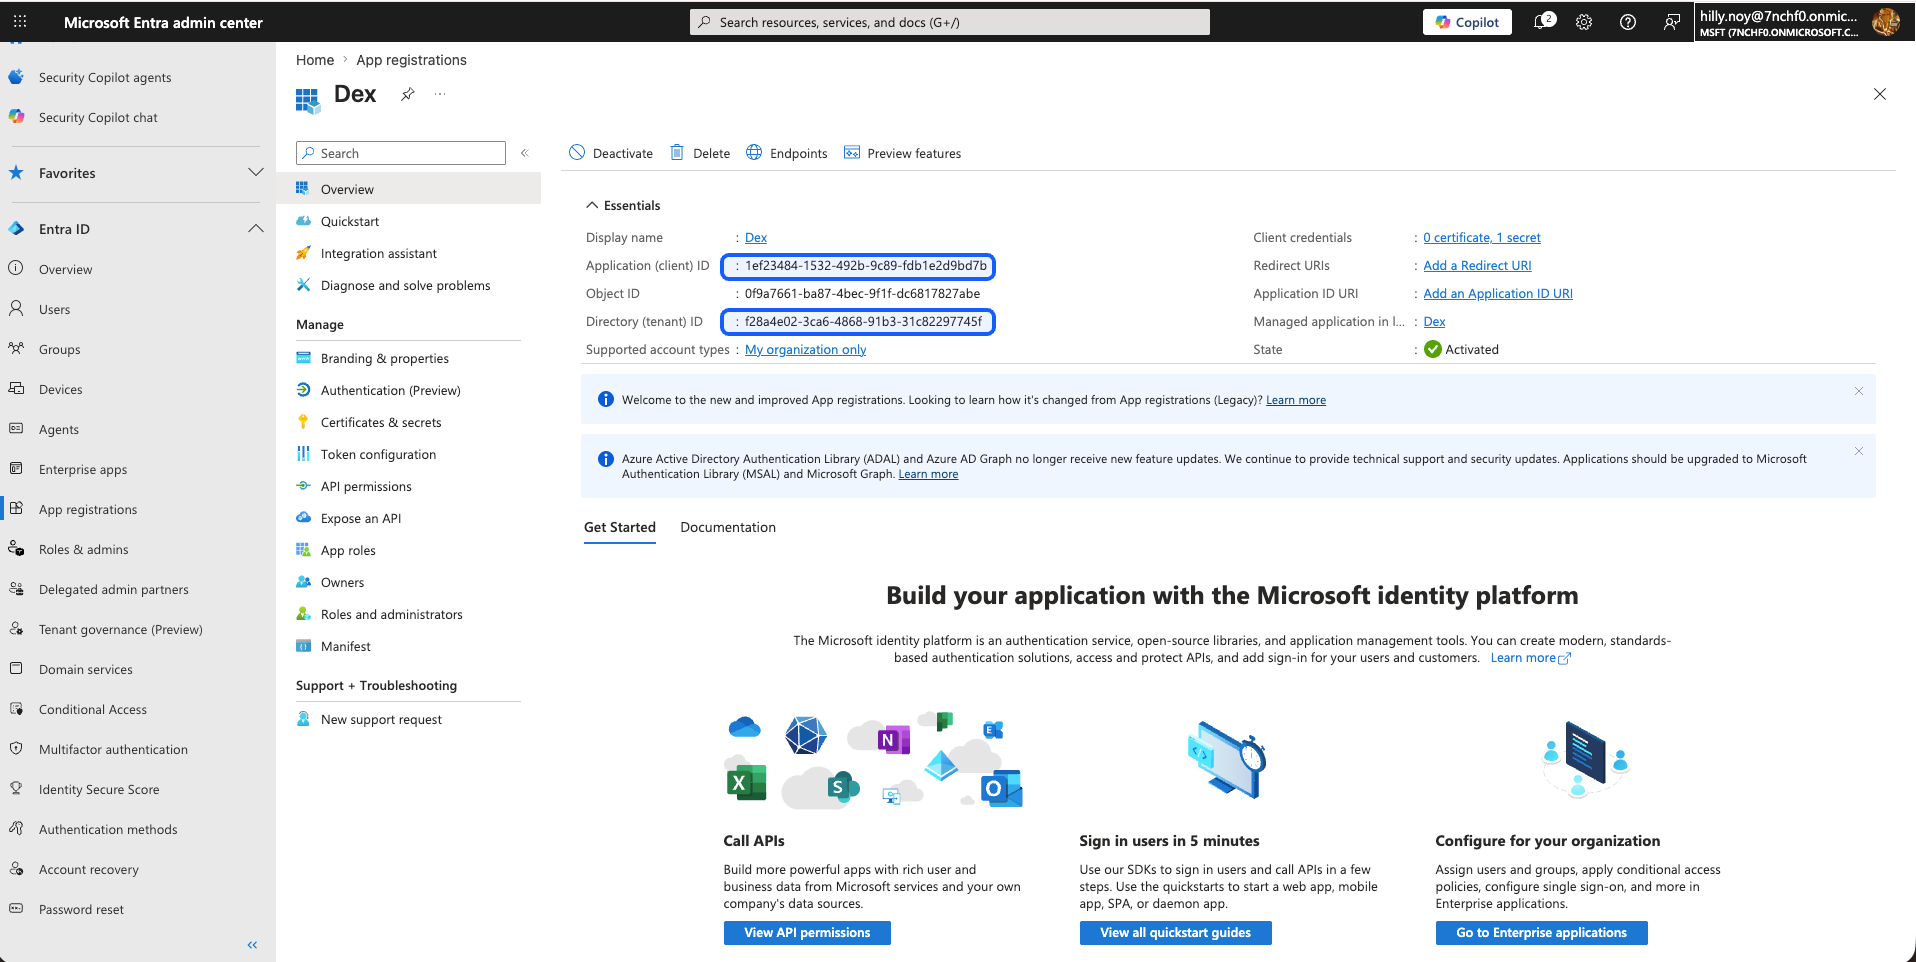
App Overview — copy the Directory (tenant) ID and Application (client) ID from here. Screenshot
App Overview — copy the Directory (tenant) ID and Application (client) ID from here.
The values pasted into the Dex Add tenant dialog, then Add Tenant. Screenshot
The values pasted into the Dex Add tenant dialog, then Add Tenant.
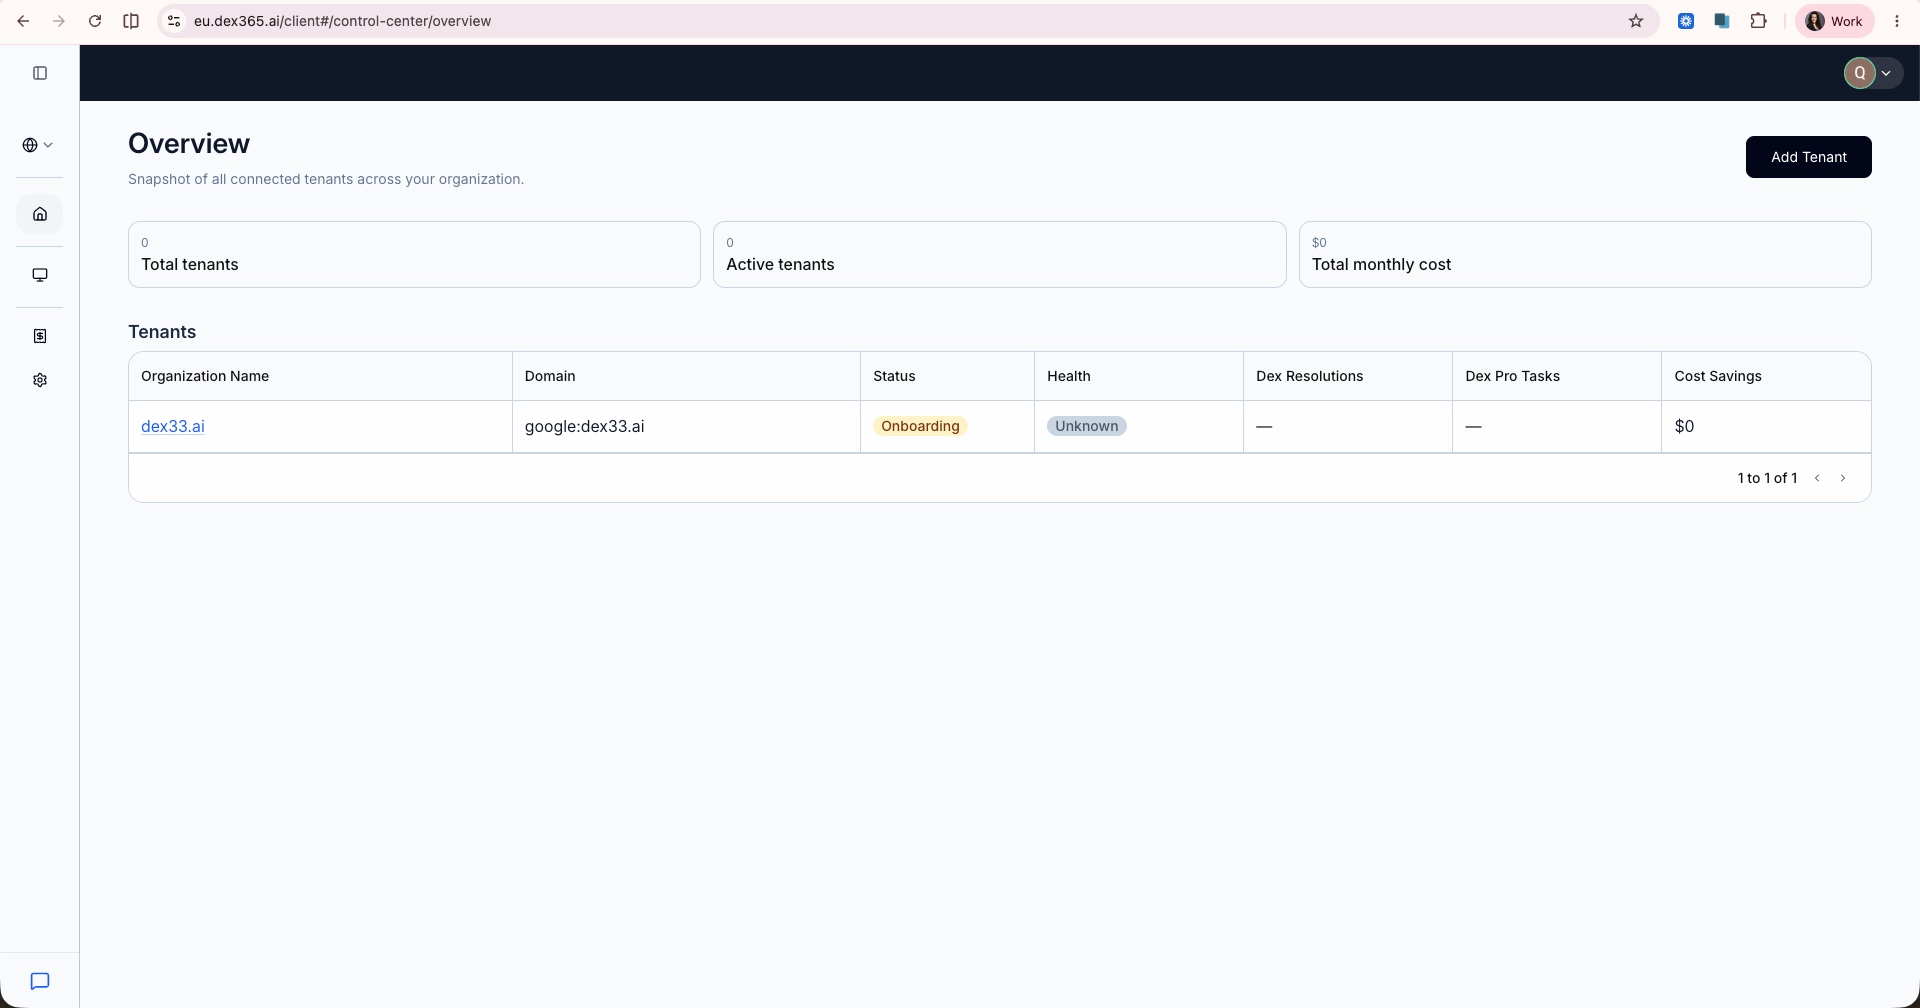
Right after Add Tenant — the tenant is listed with status Onboarding. Screenshot
Right after Add Tenant — the tenant is listed with status Onboarding.
Use the Directory (tenant) ID — not the Object ID
On the app's Overview page these sit close together and look similar. The Object ID here is 0f9a7661…; the Directory (tenant) ID is f28a4e02…. Dex needs the Directory (tenant) ID in the first field.
What Dex does when you click Add Tenant
Dex acquires an app-only token to verify the credentials, calls /organization on Microsoft Graph to confirm the tenant matches, looks up the service principal and its granted app roles, and compares them against the required list — reporting any that are missing. If everything checks out, the tenant appears as Onboarding and Dex automatically starts a discovery scan.

Tenant added and active

Dex has the tenant's credentials, finished onboarding, and the tenant now shows status Active in your Overview. Next, run discovery so Dex can map the tenant's users, groups, devices, and resources — then review and go live.